Student Handout


General Activity Contract
| Part Description | Notes | Download |
|---|---|---|
Beam 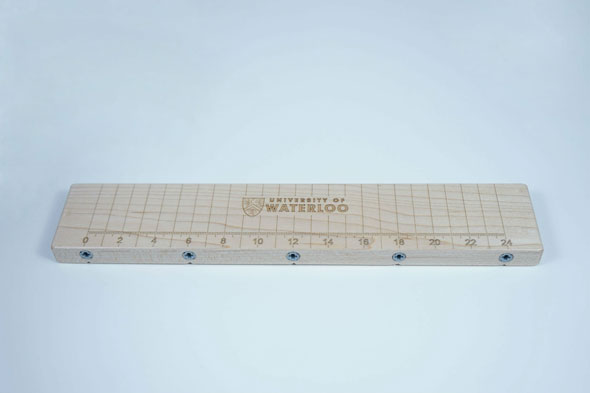 |
The beam should be lightweight, rigid, and uniform in density. The etched scale on the top face of the beam facilitates load placement while the bevelled slots on its underside help position the supports and prevent them from shifting during the Activity. Alternatively, the top-side markings could be drawn by hand using ink, they could be ink-jet printed, or commercially-available rulers could be inset. The beam can be made much thinner if it does not need to accommodate inserts for the torque tool. We made our beams of hard maple for strength and because laser etching on it could be read easily. For durability, all edges and corners were given a 1mm round and all surfaces were coated with a waterproof finish. Our etched parts were supplied by a local wood artist (masterpiece.on.ca) in Guelph, Ontario. Special thanks to craftsman Paul Szewc and laser artist Suzie Nightingale. Quantity: 1 |
|
Rectangular Load 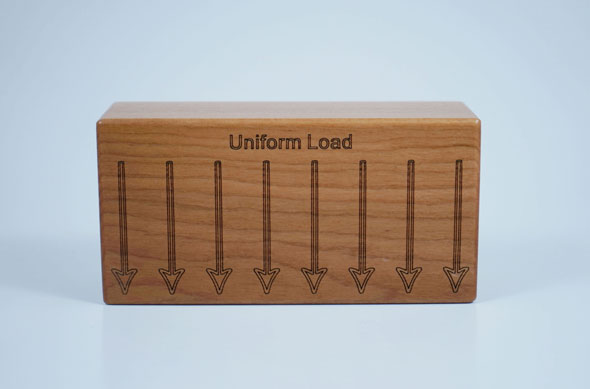 |
The load blocks should be heavy enough that students can feel their weight, and they should have consistent, uniform density. We used cherry wood because of its beauty (we wanted our students to begin to appreciate fine woods) and because that wood contrasted with the maple but was still light enough in colour that laser etching could be made out. The arrow markings are not crucial to function, but they are useful for helping students to connect the loads with the drawing symbols they use to represent them. Note that the arrows on the fronts and backs of all of the load blocks are orthogonal to each other. Quantity: 1 |
|
Triangular Load “A” 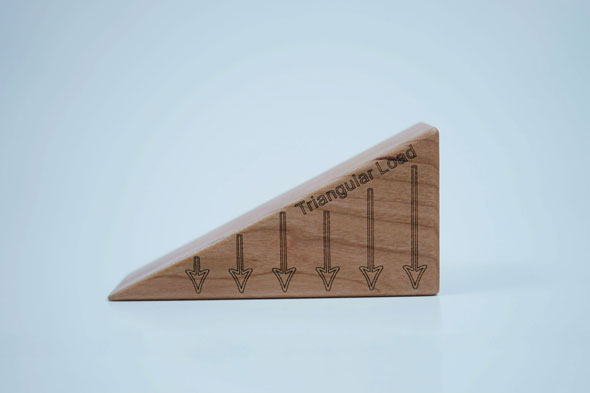 |
See entry above. |
|
Triangular Load “B” 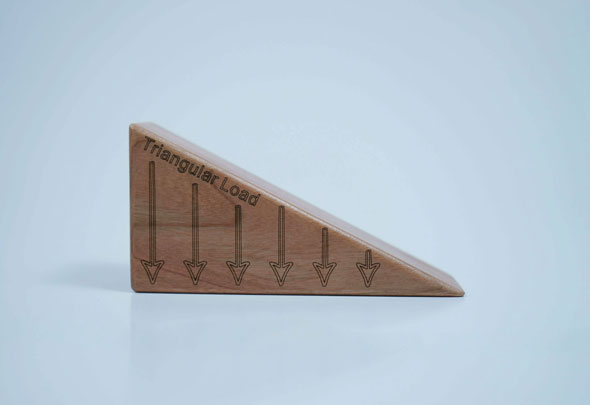 |
The “B” triangle is a mirror image of the “A” triangle (except for the writing). |
|
Supports 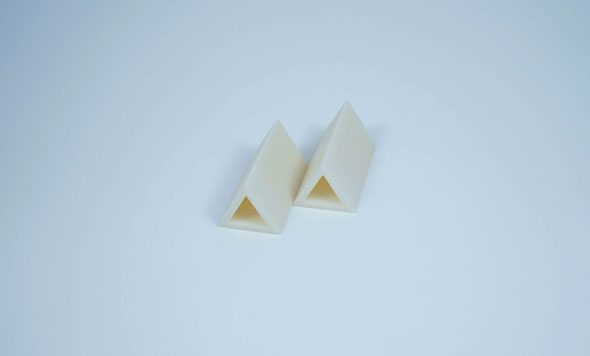 |
The supports should be lightweight and strong, and they should have sharp, durable corners. We 3D printed ours. Hard plastic or thin aluminum hollow triangular extrusions cut to length could also work. Quantity: 2 |
|
Matchsticks 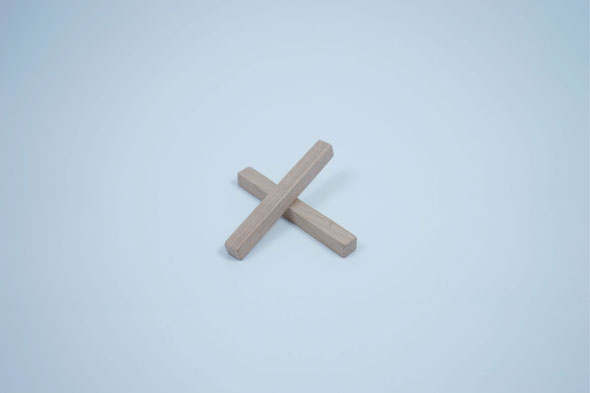 |
The matchsticks should be light and hard, and have reasonably sharp corners to facilitate balancing of the load blocks on top of them. Matchsticks that were 3D printed had a very low friction coefficient and were surprisingly difficult to use, and so we made our matchsticks of unfinished hard maple. Quantity: 2 |
|
Torque Tool 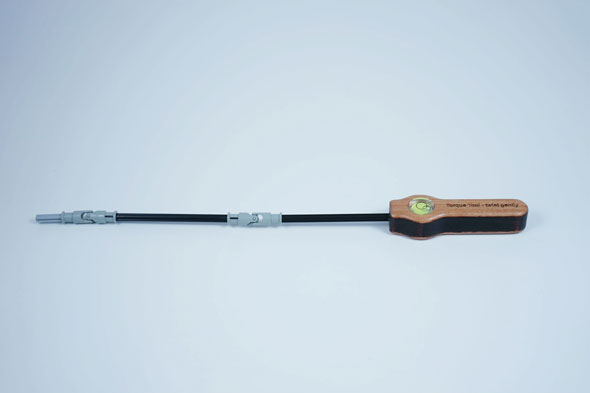 |
For details of the Torque Tool, see the How We Made It section. Our handle was laser cut and etched. The shafts and U-joints were Lego parts, but have since become unavailable. 3D printed parts could easily be used. The handle was offset by 45 degrees from the shaft cross-section, so that the shaft section had to be torqued and twisted in order to bring the bubble levels (leveldevelopments.com Part # AV15G) to a level position. Quantity: 1 |
|
Weigh Scale 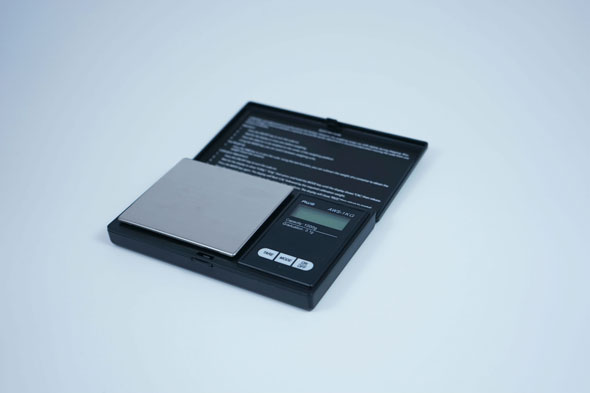 |
The weigh scales should have 3 or 4 digits of accuracy, “tare” capability and, to prevent overloading damage to the sales, more capacity than the sum of the weights of all of the kit components (not including the case and other scale). We used American Weigh Scales AWS-1KG-BLK scales with 1000g capacity and 0.1g sensitivity, and auto shut-off. Quantity: 2 |
|
Plastic Case & Foam Insert 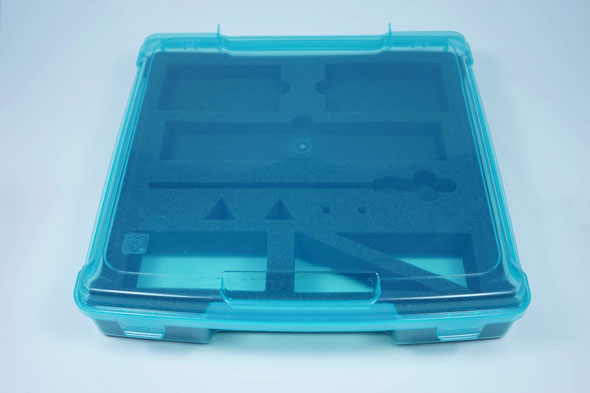 |
The plastic case we used was the light blue Iris (Part # SBC-350E) Scrapbook Storage Case (14.3” x 14.4” x 3.1” for 12” by 12”scrapbooks; canada.michaels.com or irisusainc.com). The foam inserts were custom designed for us by Mr. Paul McDonald at The Foam Store, Kitchener, Ontario (thefoamstore.ca) and were cut by water jet. The case and foam insert provide protection for the kit components, help the teaching assistants ensure that returned kits are complete, and enhance overall appearance. Quantity: 1 |