1. insert the CD and a window should pop up prompting to install the software. If it does not use Windows explorer to find Launch.exe at the root of the CD.
2. Follow the prompts to install the "Network Installation"
3. Try running the software, If SAP2000 is slow in locating the license, (or can't find it), set the System Environment Variable LSFORCEHOST on the workstation to the host name of the computer running the License Manager software.
To set a System Environment Variable:
-right-click on "My Computer"
-choose 'properties'
-click 'advanced' tab
-click 'Environment Variables' button
-under System variables click "New":
variable name:LSFORCEHOST
variable value:civlic1.uwaterloo.ca
Reboot the workstation for the Environment Variable to take effect.
4. You need to network connection each time you start SAP2000 to
connect to the license server. If you need offline access to the license
server use a Commuter License (below).
Using a SAP2000 Commuter License
Before your you check out a commuter authorization, make sure that
your portable computer:
• Has SAP2000 Network Version installed and ready to use. Remember that
the application must be able to run off the network.
• Has network access to the appropriate license server. (If you can run SAP2000 without a licensing error you have access.)
• Is connected to the network.
• Has access to the Wcommute utility (found in C:\Program Files\Computers and Structures\SAP2000 10 Server\License Manager)
Using Wcommute
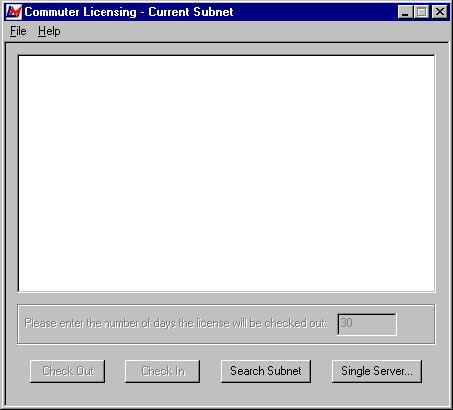
1. Within Windows Explorer, navigate to the wcommute.exe file (found in C:\Program Files\Computers and Structures\SAP2000 10 Server\License Manager) and double-click it to run it. You see the main Wcommute display:

2. To find an authorization for the commuter license you want to use, click Single Server.
Once. you click Single Server, a dialog box displays asking you to enter the name of the license server you want to contact. Enter the license server computer’s host name:
civlic1.uwaterloo.ca
...and click OK.
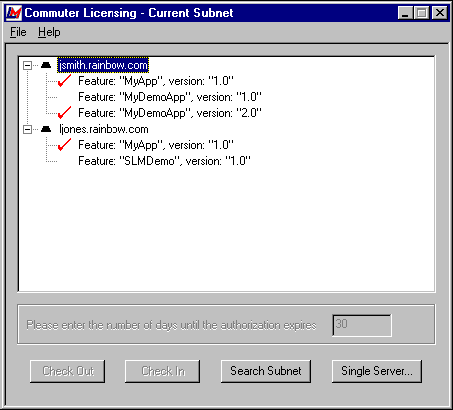
3. After selecting the license server for which you want to see commuter licenses, the Wcommute display changes to look something like this:

4. For each license server, you see a list of commuter licenses for which you can check out an authorization. If you see a red check mark next to a commuter license, that means that an authorization has already been checked out to your portable computer. You may not check out an authorization if it is already checked out.
To check out an authorization, click once on a license to select it. The Please enter the number of days until the authorization expires text box becomes active. Type a number from one to 30 to select the number of days the authorization will be checked out. By checking out an authorization to use the application, you decrease the number of available uses of the application for other network users, so specify the minimum number of days that you need.
Next click Check Out. Remember the name of the license server from which you obtained the authorization. You will need to check the authorization back into the same license server later.
5. To check in an authorization, look for the license under the license server
from which you checked it out. Click once on it in the display to select it.
(There should be a red check mark next to it, indicating that you have it
checked out.) Click Check In.
Note You must check the authorization back into the same license server from which you checked it out.
6. To exit Wcommute, go to the File menu and select Exit.